TABLE OF CONTENTS

  1. 系统资源
  2. 一、系统基础配置
    1. 工作、日志及数据存储目录创建
    2. 取消SELINUX设定,关闭防火墙和关闭交换分区
    3. ulimit优化
    4. 内核及网络参数优化
    5. Kubernetes主机hosts设置
  3. Deploy主机环境搭建
    1. Docker安装
    2. docker-compose安装
    3. Harbor安装
      1. 修改配置文件harbor.yml
      2. 导入Harbor镜像
      3. 启动Harbor
  4. Kubernetes集群配置
    1. Docker安装
    2. Kubernetes安装
      1. Deploy主机下载镜像
        1. 可能遇到的问题
      2. Master节点
        1. 部署首个Master
        2. 配置网络插件flannel
        3. 其他Master
      3. Worker节点
      4. 可能遇到的问题
        1. 1.Pod状态显示ImagePullBackoff
        2. 常用的定位命令
      5. Kubernetes常用命令
  5. 附录
    1. 网络插件flannel的配置文件
  6. 参考文章

Harbor + Docker搭建K8s集群

系统资源

IP 角色 主机名 组件 配置
192.168.2.183 Windows10,个人PC Tsukasa VMWare -
192.168.2.100 deploy tsukasa ansible, docker, harbor 4Cx2Gx20G
192.168.2.100 kubernetes k8s-master kubectl, kubelet, kubeadm, flnanel 2Cx2Gx20G
192.168.2.101 kubernetes k8s-worker01 kubectl 2Cx1Gx20G
192.168.2.102 kubernetes k8s-worker02 kubectl 2Cx1Gx20G
192.168.2.103 etcd etcd01 etcd 2Cx1Gx20G
192.168.2.104 etcd etcd02 etcd 1Cx1Gx10G
192.168.2.105 etcd etcd03(leader) etcd 1Cx1Gx10G
192.168.2.106 mysql mysql01 mysql 2Cx1Gx15G
192.168.2.107 mysql mysql02 mysql 2Cx1Gx15G

一、系统基础配置

工作、日志及数据存储目录创建

deploy节点执行

1
2
3
4
5
6
7
8
9
10
11
# 在deploy主机也创建对应目录
mkdir -p /export/servers
mkdir -p /export/logs
mkdir -p /export/data
mkdir -p /export/upload

# 分发命令到所有节点
ansible all -m command -a "mkdir -p /export/servers"
ansible all -m command -a "mkdir -p /export/logs"
ansible all -m command -a "mkdir -p /export/data"
ansible all -m command -a "mkdir -p /export/upload"

取消SELINUX设定,关闭防火墙和关闭交换分区

deploy节点执行

1
2
3
4
5
6
7
8
9
10
11
12
13
14
15
# 取消SELINUX设定
ansible k8s -m command -a "setenforce 0"
ansible k8s -m command -a "sed --follow-symlinks -i 's/SELINUX=enforcing/SELINUX=disabled/g' /etc/selinux/config"
# 关闭防火墙
ansible k8s -m command -a "firewall-cmd --set-default-zone=trusted"
ansible k8s -m command -a "firewall-cmd --complete-reload"

# 临时关闭交换分区
ansible k8s -m command -a "swapoff -a"
# 设置系统加载时关闭交换分区
ansible k8s -m shell -a "yes | cp /etc/fstab /etc/fstab_bak"
ansible k8s -m shell -a "cat /etc/fstab_bak | grep -v swap > /etc/fstab"
ansible k8s -m shell -a "echo vm.swappiness = 0 >> /etc/sysctl.d/k8s.conf"
ansible k8s -m shell -a "sysctl -p /etc/sysctl.d/k8s.conf"

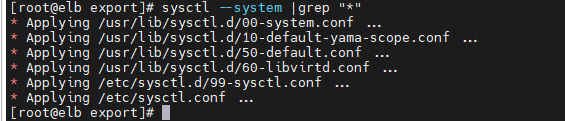
如果对sysctl加载顺序感兴趣,可以执行sysctl --system查看

ulimit优化

ulimit用来限制每个用户可以使用的资源,如CPU、内存、句柄等。

/etc/security/limits.conf设置以下内容:

1
2
3
4
5
6
* soft memlock unlimited
* hard memlock unlimited
* soft nproc 102400
* hard nproc 102400
* soft nofile 1048576
* hard nofile 1048576

ansible命令:

1
2
3
4
5
6
7
8
9
ansible all -m shell -a "cat >> /etc/security/limits.conf << EOF
* soft memlock unlimited
* hard memlock unlimited
* soft nproc 102400
* hard nproc 102400
* soft nofile 1048576
* hard nofile 1048576

EOF"

内核及网络参数优化

所有节点的/etc/sysctl.conf添加下面配置信息,可以通过ansible命令批量添加。

1
2
3
4
5
6
7
8
9
10
fs.file-max = 1048576
net.ipv4.tcp_syncookies = 1
net.ipv4.tcp_tw_reuse = 1
net.ipv4.tcp_fin_timeout = 5
net.ipv4.neigh.default.gc_stale_time = 120
net.ipv4.conf.default.rp_filter = 0
net.ipv4.conf.all.rp_filter = 0
net.ipv4.conf.all.arp_announce = 2
net.ipv4.conf.lo.arp_announce = 2
vm.max_map_count = 262144

ansible命令:

1
2
3
4
5
6
7
8
9
10
11
12
13
14
15
16
17
18
ansible all -m shell -a "cat >> /etc/sysctl.conf << EOF
fs.file-max = 1048576
net.ipv4.tcp_syncookies = 1
net.ipv4.tcp_tw_reuse = 1
net.ipv4.tcp_fin_timeout = 5
net.ipv4.neigh.default.gc_stale_time = 120
net.ipv4.conf.default.rp_filter = 0
net.ipv4.conf.all.rp_filter = 0
net.ipv4.conf.all.arp_announce = 2
net.ipv4.conf.lo.arp_announce = 2
vm.max_map_count = 262144

EOF"

# 重新加载让配置生效
ansible all -m command -a "sysctl -p"
# 查询所有配置,根据需要执行
sysctl -a

Kubernetes主机hosts设置

cd /export/upload && vim hosts_set.sh,输入下面内容:

1
2
3
4
5
6
7
8
9
10
#!/bin/bash
cat > /etc/hosts << EOF
127.0.0.1 localhost localhost.localdomain localhost4 localhost4.localdomain4
::1 localhost localhost.localdomain localhost6 localhost6.localdomain6
192.168.2.99 deploy harbor
192.168.2.100 master01
192.168.2.101 worker01
192.168.2.102 worker02

EOF

deploy主机执行:

1
2
ansible k8s -m copy -a 'src=/export/upload/hosts_set.sh dest=/export/upload'
ansible k8s -m command -a 'sh /export/upload/hosts_set.sh'

Deploy主机环境搭建

Docker安装

deploy主机的docker主要用于harbor针对镜像的操作,包括镜像的打tag以及push,用于后期部署pod的时候直接通过harbor私有镜像库拉取。

1
2
3
4
5
6
7
8
9
10
11
12
# 在线安装
yum -y install docker-ce-20.10.17
# 或者提前上传docker及其依赖rpm包,进行离线安装:yum -y ./*rpm

# 启动docker
systemctl start docker
# 查看Docker状态
systemctl status docker
# 查看docker版本
docker version
# 设置开机自启
systemctl enable docker

docker-compose安装

harbor私有镜像库的依赖docker-compose,deploy主机安装。

1
2
3
4
5
6
7
8
9
10
# 可以打开下面网址,用PC下载docker-compose-linux-x86_64后,通过ftp上传到deploy服务器,目录需要有写权限
$ curl -L https://github.com/docker/compose/releases/download/v2.20.0/docker-compose-linux-x86_64 -o docker-compose

# 移动到/usr/local/bin/并添加执行权限
mv docker-compose /usr/local/bin/
chmod +x /usr/local/bin/docker-compose
docker-compose version

# 查看docker-compose的版本
docker-compose version

Harbor安装

私有镜像仓库,deploy主机安装。

1
2
3
4
5
6
7
8
# 下载
wget https://github.com/goharbor/harbor/releases/download/v2.4.3/harbor-offline-installer-v2.4.3.tgz

# 解压并进行配置
tar -xzvf harbor-offline-installer-v2.4.3.tgz -C /export/servers/
cd /export/servers/harbor
mv harbor.yml.tmpl harbor.yml

修改配置文件harbor.yml

执行配置文件修改vim harbor.yml

1
2
3
4
5
6
7
8
9
10
11
12
13
14
15
16
17
18
19
20
21
22
23
24
25
# 1.修改对应配置如下,注意配置文件为yml,修改需要符合yml语法
hostname: 192.168.2.99
http:
port: 8090

data_volume: /export/data/harbor

log:
location: /export/logs/harbor

# 2.注释下面内容
# https related config
#https:
# https port for harbor, default is 443
#port: 443
# The path of cert and key files for nginx
#certificate: /your/certificate/path
#private_key: /your/private/key/path

# 3.配置管理员密码
harbor_admin_password: harbor950101
database:
# The password for the root user of Harbor DB. Change this before any production use.
password: admin

执行命令使配置文件修改生效

1
2
./prepare  # 如果有二次修改harbor.yml文件,需执行该命令让配置文件生效
./install.sh --help # 查看启动参数

导入Harbor镜像

1
2
3
4
5
6
7
8
9
10
11
12
13
14
15
16
17
18
19
20
21
22
23
24
cd /export/servers/harbor
# harbor-offline-installer-v2.4.3.tgz解压后可以看到harbor.v2.4.3.tar.gz,用docker导入
docker load -i harbor.v2.4.3.tar.gz

# 查看镜像
docker images

REPOSITORY TAG IMAGE ID CREATED SIZE
goharbor/harbor-exporter v2.4.3 776ac6ee91f4 4 weeks ago 81.5MB
goharbor/chartmuseum-photon v2.4.3 f39a9694988d 4 weeks ago 172MB
goharbor/redis-photon v2.4.3 b168e9750dc8 4 weeks ago 154MB
goharbor/trivy-adapter-photon v2.4.3 a406a715461c 4 weeks ago 251MB
goharbor/notary-server-photon v2.4.3 da89404c7cf9 4 weeks ago 109MB
goharbor/notary-signer-photon v2.4.3 38468ac13836 4 weeks ago 107MB
goharbor/harbor-registryctl v2.4.3 61243a84642b 4 weeks ago 135MB
goharbor/registry-photon v2.4.3 9855479dd6fa 4 weeks ago 77.9MB
goharbor/nginx-photon v2.4.3 0165c71ef734 4 weeks ago 44.4MB
goharbor/harbor-log v2.4.3 57ceb170dac4 4 weeks ago 161MB
goharbor/harbor-jobservice v2.4.3 7fea87c4b884 4 weeks ago 219MB
goharbor/harbor-core v2.4.3 d864774a3b8f 4 weeks ago 197MB
goharbor/harbor-portal v2.4.3 85f00db66862 4 weeks ago 53.4MB
goharbor/harbor-db v2.4.3 7693d44a2ad6 4 weeks ago 225MB
goharbor/prepare v2.4.3 c882d74725ee 4 weeks ago 268MB

如果没有按照编辑harbor.yml章节注释,会遇到下面报错。

1
2
3
prepare base dir is set to /export/servers/harbor
Error happened in config validation...
ERROR:root:Error: The protocol is https but attribute ssl_cert is not set

启动Harbor

如果配置文件harbor.yml有改动,需要执行./prepare使配置修改生效后再启动。

1
./install.sh --with-chartmuseum

启动成功后,浏览器可以直接访问Harbor:http://192.168.2.99:8090/,根据harbor.yml配置的管理员帐号和密码登陆

配置对Harbor的HTTPS访问请参考:
https://blog.csdn.net/RtxTitanV/article/details/107140001

Kubernetes集群配置

Docker安装

docker离线下载地址:https://download.docker.com/linux/static/stable/x86_64/

配置docker-ce.repo的镜像仓库

1
2
3
4
wget https://mirrors.aliyun.com/docker-ce/linux/centos/docker-ce.repo -O /etc/yum.repos.d/docker-ce.repo
# 或者通过下面方式添加下面方式添加镜像仓库
# yum-config-manager --add-repo https://mirrors.aliyun.com/docker-ce/linux/centos/docker-ce.repo

我们要在所有K8s节点安装Docker,因此下载回来后离线安装更快捷。

yum命令只下载不安装命令:

1
yum -y install --downloadonly -downloaddir /export/upload docker-ce-20.10.17

deploy主机执行下面的ansible命令,将打包好的压缩包分发给k8s集群机器,并执行解压、安装,启动docker等操作。

1
2
3
4
5
6
7
8
# 分发安装包
ansible k8s -m copy -a "src=/export/upload/docker-rpm.tar.gz dest=/export/upload/"
# 解压并安装
ansible k8s -m shell -a "tar -xzvf /export/upload/docker-rpm.tar.gz -C /export/upload/ && yum -y install /export/upload/docker-rpm/*"
# 设置Docker开机自启,以及启动Docker
ansible k8s -m shell -a "systemctl enable docker && systemctl start docker"
# 查看Docker启动状态
ansible k8s -m shell -a "docker version"

所有k8s节点返回下面消息证明完成安装

附:常用压缩打包、解压缩命令

1
2
3
4
5
6
# 打包
tar –cvf xxx.tar <file or dir>
# 打包并且压缩
tar –zcvf docker-rpm.tar.gz <file or dir>
# 解压缩到指定位置
tar -xzvf docker-rpm.tar.gz -C <位置>

Kubernetes安装

deploy节点执行,所有k8s节点需要安装。

1、添加阿里云YUM的kubernetes软件源:

1
2
3
4
5
6
7
8
9
cat > /etc/yum.repos.d/kubernetes.repo << EOF
[kubernetes]
name=Kubernetes
baseurl=https://mirrors.aliyun.com/kubernetes/yum/repos/kubernetes-el7-x86_64
enabled=1
gpgcheck=0
repo_gpgcheck=0
gpgkey=https://mirrors.aliyun.com/kubernetes/yum/doc/yum-key.gpg https://mirrors.aliyun.com/kubernetes/yum/doc/rpm-package-key.gpg
EOF

2、下载kubelet、kubeadm、kubectl组件但不安装:

1
yum install -y kubelet-1.22.4 kubeadm-1.22.4 kubectl-1.22.4 --downloadonly --downloaddir /export/download/kubeadm-rpm

3、执行解压

1
2
cd /export/download
tar -zcvf kubeadm-rpm.tgz kubeadm-rpm

4、分发到k8s集群所有节点并解压安装

1
2
ansible k8s -m copy -a "src=/export/upload/kubeadm-rpm.tgz dest=/export/upload/"
ansible k8s -m shell -a "tar xzvf /export/upload/kubeadm-rpm.tgz -C /export/upload/ && yum -y install /export/upload/kubeadm-rpm/*"

5、启动kubelet并设置开机自启

1
ansible k8s -m shell -a "systemctl enable kubelet && systemctl start kubelet"

注:此时kubelet启动失败,会进入不断重启,这个是正常现象,执行init或join后问题会自动解决,对此官网有如下描述,也就是此时不用理会kubelet.service,可执行发下命令查看kubelet状态。

journalctl -xefu kubelet可以查看日志:

1
2
3
4
5
6
7
8
9
10
11
12
Jul 29 08:34:33 k8s-worker02 systemd[1]: Starting kubelet: The Kubernetes Node Agent...
-- Subject: Unit kubelet.service has begun start-up
-- Defined-By: systemd
-- Support: http://lists.freedesktop.org/mailman/listinfo/systemd-devel
--
-- Unit kubelet.service has begun starting up.
Jul 29 08:34:33 k8s-worker02 kubelet[9377]: E0729 08:34:33.685622 9377 server.go:206] "Failed to load kubelet config file" err="failed to load Kubelet config file /var/lib/kubelet/config.yaml, error failed to read kubelet config file \"/var/lib/kubelet/config.yaml\", error: open /var/lib/kubelet/config.yaml: no such file or directory" path="/var/lib/kubelet/config.yaml"
Jul 29 08:34:33 k8s-worker02 systemd[1]: kubelet.service: main process exited, code=exited, status=1/FAILURE
Jul 29 08:34:33 k8s-worker02 systemd[1]: Unit kubelet.service entered failed state.
Jul 29 08:34:33 k8s-worker02 systemd[1]: kubelet.service failed.
Jul 29 08:34:43 k8s-worker02 systemd[1]: kubelet.service holdoff time over, scheduling restart.
Jul 29 08:34:43 k8s-worker02 systemd[1]: Started kubelet: The Kubernetes Node Agent.

Deploy主机下载镜像

1
2
3
4
5
6
7
8
9
10
11
12
13
14
15
16
17
18
19
20
21
22
23
24
25
26
27
28
29
30
31
32
33
34
35
36
37
38
39
40
41
42
43
44
45
46
47
48
49
50
51
52
53
54
55
56
57
# Docker拉取镜像
docker pull registry.cn-hangzhou.aliyuncs.com/google_containers/coredns:v1.8.4
docker pull registry.cn-hangzhou.aliyuncs.com/google_containers/etcd:3.5.0-0
docker pull registry.cn-hangzhou.aliyuncs.com/google_containers/kube-apiserver:v1.22.4
docker pull registry.cn-hangzhou.aliyuncs.com/google_containers/kube-controller-manager:v1.22.4
docker pull registry.cn-hangzhou.aliyuncs.com/google_containers/kube-proxy:v1.22.4
docker pull registry.cn-hangzhou.aliyuncs.com/google_containers/kube-scheduler:v1.22.4
docker pull registry.cn-hangzhou.aliyuncs.com/google_containers/pause:3.5
docker pull rancher/mirrored-flannelcni-flannel-cni-plugin:v1.1.0
docker pull rancher/mirrored-flannelcni-flannel:v0.19.1


# 导出镜像到/export/upload/docker-images/位置
mkdir -p /export/upload/docker-images/
docker save -o /export/upload/docker-images/rancher-mirrored-flannelcni-flannel-v0.19.1.tar rancher/mirrored-flannelcni-flannel
docker save -o /export/upload/docker-images/rancher-mirrored-flannelcni-flannel-cni-plugin-v1.1.0.tar rancher/mirrored-flannelcni-flannel-cni-plugin
docker save -o /export/upload/docker-images/google_containers-kube-apiserver-v1.22.4.tar registry.cn-hangzhou.aliyuncs.com/google_containers/kube-apiserver
docker save -o /export/upload/docker-images/google_containers-kube-controller-manager-v1.22.4.tar registry.cn-hangzhou.aliyuncs.com/google_containers/kube-controller-manager
docker save -o /export/upload/docker-images/google_containers-kube-scheduler-v1.22.4.tar registry.cn-hangzhou.aliyuncs.com/google_containers/kube-scheduler
docker save -o /export/upload/docker-images/google_containers-kube-proxy-v1.22.4.tar registry.cn-hangzhou.aliyuncs.com/google_containers/kube-proxy
docker save -o /export/upload/docker-images/google_containers-etcd-3.5.0-0.tar registry.cn-hangzhou.aliyuncs.com/google_containers/etcd
docker save -o /export/upload/docker-images/google_containers-coredns-v1.8.4.tar registry.cn-hangzhou.aliyuncs.com/google_containers/coredns
docker save -o /export/upload/docker-images/google_containers-pause-3.5.tar registry.cn-hangzhou.aliyuncs.com/google_containers/pause

# Docker导入镜像
cd /export/upload/docker-images/
docker load -i rancher-mirrored-flannelcni-flannel-v0.19.1.tar
docker load -i rancher-mirrored-flannelcni-flannel-cni-plugin-v1.1.0.tar
docker load -i google_containers-kube-apiserver-v1.22.4.tar
docker load -i google_containers-kube-controller-manager-v1.22.4.tar
docker load -i google_containers-kube-scheduler-v1.22.4.tar
docker load -i google_containers-kube-proxy-v1.22.4.tar
docker load -i google_containers-etcd-3.5.0-0.tar
docker load -i google_containers-coredns-v1.8.4.tar
docker load -i google_containers-pause-3.5.tar

# 镜像打harbor镜像库tag
docker tag registry.cn-hangzhou.aliyuncs.com/google_containers/coredns:v1.8.4 192.168.2.99:8090/community/coredns:v1.8.4
docker tag registry.cn-hangzhou.aliyuncs.com/google_containers/etcd:3.5.0-0 192.168.2.99:8090/community/etcd:3.5.0-0
docker tag registry.cn-hangzhou.aliyuncs.com/google_containers/kube-apiserver:v1.22.4 192.168.2.99:8090/community/kube-apiserver:v1.22.4
docker tag registry.cn-hangzhou.aliyuncs.com/google_containers/kube-controller-manager:v1.22.4 192.168.2.99:8090/community/kube-controller-manager:v1.22.4
docker tag registry.cn-hangzhou.aliyuncs.com/google_containers/kube-proxy:v1.22.4 192.168.2.99:8090/community/kube-proxy:v1.22.4
docker tag registry.cn-hangzhou.aliyuncs.com/google_containers/kube-scheduler:v1.22.4 192.168.2.99:8090/community/kube-scheduler:v1.22.4
docker tag registry.cn-hangzhou.aliyuncs.com/google_containers/pause:3.5 192.168.2.99:8090/community/pause:3.5
docker tag rancher/mirrored-flannelcni-flannel-cni-plugin:v1.1.0 192.168.2.99:8090/community/mirrored-flannelcni-flannel-cni-plugin:v1.1.0
docker tag rancher/mirrored-flannelcni-flannel:v0.19.1 192.168.2.99:8090/community/mirrored-flannelcni-flannel:v0.19.1

# 推送至harbor镜像库,后续可以通过docker pull从harbor中直接拉取
docker push 192.168.2.99:8090/community/coredns:v1.8.4
docker push 192.168.2.99:8090/community/etcd:3.5.0-0
docker push 192.168.2.99:8090/community/kube-apiserver:v1.22.4
docker push 192.168.2.99:8090/community/kube-controller-manager:v1.22.4
docker push 192.168.2.99:8090/community/kube-proxy:v1.22.4
docker push 192.168.2.99:8090/community/kube-scheduler:v1.22.4
docker push 192.168.2.99:8090/community/pause:3.5
docker push 192.168.2.99:8090/community/mirrored-flannelcni-flannel-cni-plugin:v1.1.0
docker push 192.168.2.99:8090/community/mirrored-flannelcni-flannel:v0.19.1

可能遇到的问题

1、docker push推送过程中可能会报错,提示docker推送要求为https,而harbor服务端通信协议为http。

1
2
3
4
[root@tsukasa docker-images]# docker push 192.168.2.99:8090/community/mirrored-flannelcni-flannel:v0.19.1
The push refers to repository [192.168.2.99:8090/community/mirrored-flannelcni-flannel]
Get "https://192.168.2.99:8090/v2/": http: server gave HTTP response to HTTPS client

修改docker的配置文件/etc/docker/daemon.json(文件不存在则新增),添加下面内容,下面IP端口为harbor的http配置:

vim /etc/docker/daemon.json

1
2
3
{
"insecure-registries":["192.168.2.99:8090"]
}

重启docker服务、重新加载harbor镜像

1
2
3
4
5
6
7
systemctl daemon-reload
systemctl restart docker.service
# 重新加载harbor
docker load -i harbor.v2.4.3.tar.gz
# 启动Harbor
cd /export/servers/harbor
./install.sh --with-chartmuseum

2、docker push推送过程中提示project community not found: project community not found

1
2
3
4
5
[root@tsukasa harbor]# docker push 192.168.2.99:8090/community/coredns:v1.8.4
The push refers to repository [192.168.2.99:8090/community/coredns]
f72781b18181: Preparing
225df95e717c: Preparing
unauthorized: project community not found: project community not found
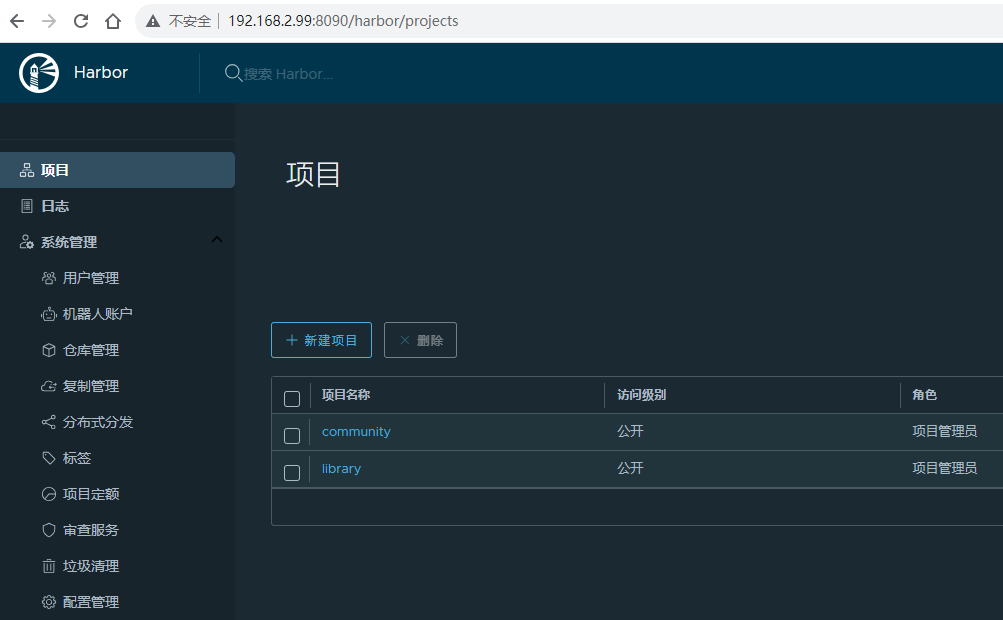
解决办法是在harbor管理台创建项目

3、docker push进行推送时出现unauthorized: unauthorized to access repository

1
2
3
4
5
6
[root@tsukasa harbor]# docker push 192.168.2.99:8090/community/coredns:v1.8.4
The push refers to repository [192.168.2.99:8090/community/coredns]
f72781b18181: Preparing
225df95e717c: Preparing
unauthorized: unauthorized to access repository: community/coredns, action: push: unauthorized to access repository: community/coredns, action: push

解决办法是在需要推送镜像的主机上(这里是deploy)登陆harbor:docker login 192.168.2.99:8090

1
2
3
4
5
6
7
[root@tsukasa harbor]# docker login 192.168.2.99:8090
Username: admin
Password:
WARNING! Your password will be stored unencrypted in /root/.docker/config.json.
Configure a credential helper to remove this warning. See
https://docs.docker.com/engine/reference/commandline/login/#credentials-store

Master节点

通常地,k8s集群Master节点有多个,本地因资源问题,只创建了一台master。

部署首个Master

1、在docker配置文件/etc/docker/daemon.json中添加下面内容,重启docker

1
2
3
{
"exec-opts": ["native.cgroupdriver=systemd"]
}

重启docker

1
systemctl restart docker

3、在k8s-master(ip:192.168.2.100)执行初始化:

1
2
3
4
5
6
7
8
9
10
11
12
# 如果初始化失败,先强制重置kubeadm再初始化:kubeadm reset -f
# 初始化
kubeadm init \
--control-plane-endpoint "192.168.2.100:6443" \
--image-repository 192.168.2.99:8090/community \
--kubernetes-version v1.22.4 \
--service-cidr=172.16.0.0/16 \
--pod-network-cidr=10.244.0.0/16 \
--token "abcdef.0123456789abcdef" \
--token-ttl "0" \
--upload-certs

--image-repository参数是镜像仓库,目前设置为搭建的harbor,也可以使用阿里云registry.aliyuncs.com/google_containers

执行后的控台输出如下,进行其他Master和Worker节点初始化需要用到

1
2
3
4
5
6
7
8
9
10
11
12
13
14
15
16
17
18
19
20
21
22
23
24
25
26
27
28
29
30
31
32
33
34
35
36
37
38
39
40
41
42
43
44
45
46
47
48
49
50
51
52
53
54
55
56
57
58
59
60
61
62
63
64
65
66
67
68
69
70
71
72
73
74
75
76
77
78
79
80
81
82
83
84
85
86
87
88
89
90
91
92
93
94
95
96
[root@k8s-master ~]# kubeadm init \
> --control-plane-endpoint "192.168.2.100:6443" \
> --image-repository 192.168.2.99:8090/community \
> --kubernetes-version v1.22.4 \
> --service-cidr=172.16.0.0/16 \
> --pod-network-cidr=10.244.0.0/16 \
> --token "abcdef.0123456789abcdef" \
> --token-ttl "0" \
> --upload-certs
[init] Using Kubernetes version: v1.22.4
[preflight] Running pre-flight checks
[WARNING Firewalld]: firewalld is active, please ensure ports [6443 10250] are open or your cluster may not function correctly
[WARNING Hostname]: hostname "k8s-master" could not be reached
[WARNING Hostname]: hostname "k8s-master": lookup k8s-master on 223.5.5.5:53: no such host
[preflight] Pulling images required for setting up a Kubernetes cluster
[preflight] This might take a minute or two, depending on the speed of your internet connection
[preflight] You can also perform this action in beforehand using 'kubeadm config images pull'
[certs] Using certificateDir folder "/etc/kubernetes/pki"
[certs] Generating "ca" certificate and key
[certs] Generating "apiserver" certificate and key
[certs] apiserver serving cert is signed for DNS names [k8s-master kubernetes kubernetes.default kubernetes.default.svc kubernetes.default.svc.cluster.local] and IPs [172.16.0.1 192.168.2.100]
[certs] Generating "apiserver-kubelet-client" certificate and key
[certs] Generating "front-proxy-ca" certificate and key
[certs] Generating "front-proxy-client" certificate and key
[certs] Generating "etcd/ca" certificate and key
[certs] Generating "etcd/server" certificate and key
[certs] etcd/server serving cert is signed for DNS names [k8s-master localhost] and IPs [192.168.2.100 127.0.0.1 ::1]
[certs] Generating "etcd/peer" certificate and key
[certs] etcd/peer serving cert is signed for DNS names [k8s-master localhost] and IPs [192.168.2.100 127.0.0.1 ::1]
[certs] Generating "etcd/healthcheck-client" certificate and key
[certs] Generating "apiserver-etcd-client" certificate and key
[certs] Generating "sa" key and public key
[kubeconfig] Using kubeconfig folder "/etc/kubernetes"
[kubeconfig] Writing "admin.conf" kubeconfig file
[kubeconfig] Writing "kubelet.conf" kubeconfig file
[kubeconfig] Writing "controller-manager.conf" kubeconfig file
[kubeconfig] Writing "scheduler.conf" kubeconfig file
[kubelet-start] Writing kubelet environment file with flags to file "/var/lib/kubelet/kubeadm-flags.env"
[kubelet-start] Writing kubelet configuration to file "/var/lib/kubelet/config.yaml"
[kubelet-start] Starting the kubelet
[control-plane] Using manifest folder "/etc/kubernetes/manifests"
[control-plane] Creating static Pod manifest for "kube-apiserver"
[control-plane] Creating static Pod manifest for "kube-controller-manager"
[control-plane] Creating static Pod manifest for "kube-scheduler"
[etcd] Creating static Pod manifest for local etcd in "/etc/kubernetes/manifests"
[wait-control-plane] Waiting for the kubelet to boot up the control plane as static Pods from directory "/etc/kubernetes/manifests". This can take up to 4m0s
[apiclient] All control plane components are healthy after 7.005575 seconds
[upload-config] Storing the configuration used in ConfigMap "kubeadm-config" in the "kube-system" Namespace
[kubelet] Creating a ConfigMap "kubelet-config-1.22" in namespace kube-system with the configuration for the kubelets in the cluster
[upload-certs] Storing the certificates in Secret "kubeadm-certs" in the "kube-system" Namespace
[upload-certs] Using certificate key:
7ed3ef5d6b04a668e7bed67e419fd9f69ce482047350e5b391357005064db994
[mark-control-plane] Marking the node k8s-master as control-plane by adding the labels: [node-role.kubernetes.io/master(deprecated) node-role.kubernetes.io/control-plane node.kubernetes.io/exclude-from-external-load-balancers]
[mark-control-plane] Marking the node k8s-master as control-plane by adding the taints [node-role.kubernetes.io/master:NoSchedule]
[bootstrap-token] Using token: abcdef.0123456789abcdef
[bootstrap-token] Configuring bootstrap tokens, cluster-info ConfigMap, RBAC Roles
[bootstrap-token] configured RBAC rules to allow Node Bootstrap tokens to get nodes
[bootstrap-token] configured RBAC rules to allow Node Bootstrap tokens to post CSRs in order for nodes to get long term certificate credentials
[bootstrap-token] configured RBAC rules to allow the csrapprover controller automatically approve CSRs from a Node Bootstrap Token
[bootstrap-token] configured RBAC rules to allow certificate rotation for all node client certificates in the cluster
[bootstrap-token] Creating the "cluster-info" ConfigMap in the "kube-public" namespace
[kubelet-finalize] Updating "/etc/kubernetes/kubelet.conf" to point to a rotatable kubelet client certificate and key
[addons] Applied essential addon: CoreDNS
[addons] Applied essential addon: kube-proxy

Your Kubernetes control-plane has initialized successfully!

To start using your cluster, you need to run the following as a regular user:

mkdir -p $HOME/.kube
sudo cp -i /etc/kubernetes/admin.conf $HOME/.kube/config
sudo chown $(id -u):$(id -g) $HOME/.kube/config

Alternatively, if you are the root user, you can run:

export KUBECONFIG=/etc/kubernetes/admin.conf

You should now deploy a pod network to the cluster.
Run "kubectl apply -f [podnetwork].yaml" with one of the options listed at:
https://kubernetes.io/docs/concepts/cluster-administration/addons/

You can now join any number of the control-plane node running the following command on each as root:

kubeadm join 192.168.2.100:6443 --token abcdef.0123456789abcdef \
--discovery-token-ca-cert-hash sha256:fdfca7204c17842d264752cc0cf9efcf4da515837f5deb7f69cc3ec3f3fe00c6 \
--control-plane --certificate-key 7ed3ef5d6b04a668e7bed67e419fd9f69ce482047350e5b391357005064db994

Please note that the certificate-key gives access to cluster sensitive data, keep it secret!
As a safeguard, uploaded-certs will be deleted in two hours; If necessary, you can use
"kubeadm init phase upload-certs --upload-certs" to reload certs afterward.

Then you can join any number of worker nodes by running the following on each as root:

kubeadm join 192.168.2.100:6443 --token abcdef.0123456789abcdef \
--discovery-token-ca-cert-hash sha256:fdfca7204c17842d264752cc0cf9efcf4da515837f5deb7f69cc3ec3f3fe00c6

如果控制台信息被清理,可以在通过下面的命令查看token

1
2
# 查看token列表
kubeadm token list

如果token过期,可以重新创建再查看token

1
2
kubeadm token create --print-join-command
kubeadm token list

4、生成kubelet环境配置文件

1
2
3
mkdir -p $HOME/.kube
sudo cp -i /etc/kubernetes/admin.conf $HOME/.kube/config
sudo chown $(id -u):$(id -g) $HOME/.kube/config

配置网络插件flannel

Kubernetes跨主机容器之间的通信组件,目前主流的是flannel和calico,这里选择flannel。
如果使用kubectl get nodes查看节点状态,Worker节点显示NotReady,是因为缺少网络插件导致的。

(1)创建/export/servers/kubernetes/flannel.yml配置文件,内容参考附录。

在执行下面的命令

1
2
# 应用flannel配置文件
kubectl apply -f /export/servers/kubernetes/flannel.yml

如果配置文件有改动需要重新加载,可以执行下面命令进行撤销

1
kubectl delete -f /export/servers/kubernetes/flannel.yml

其他Master

复制首个Master节点kubeadm初始化后的master节点加入命令,到其他Master节点执行即可。也可以用deploy主机使用ansible命令批量执行。

1
2
3
kubeadm join 192.168.2.100:6443 --token abcdef.0123456789abcdef \
--discovery-token-ca-cert-hash sha256:fdfca7204c17842d264752cc0cf9efcf4da515837f5deb7f69cc3ec3f3fe00c6 \
--control-plane --certificate-key 7ed3ef5d6b04a668e7bed67e419fd9f69ce482047350e5b391357005064db994

Worker节点

复制首个Master节点kubeadm初始化后的Worker节点加入命令,到所有Worker节点分别执行。也可以用deploy主机使用ansible命令批量执行。

1
2
kubeadm join 192.168.2.100:6443 --token abcdef.0123456789abcdef \
--discovery-token-ca-cert-hash sha256:fdfca7204c17842d264752cc0cf9efcf4da515837f5deb7f69cc3ec3f3fe00c6

ansible命令

1
2
ansible worker -m shell -a "kubeadm join 192.168.2.100:6443 --token abcdef.0123456789abcdef \
--discovery-token-ca-cert-hash sha256:fdfca7204c17842d264752cc0cf9efcf4da515837f5deb7f69cc3ec3f3fe00c6"

查看所有pod状态

1
kubectl get pods -A

至此,Kubernetes集群已经建立!

可能遇到的问题

1.Pod状态显示ImagePullBackoff

需要手动拉取镜像,等待k8s重试成功后即可解决

1
docker pull rancher/mirrored-flannelcni-flannel:v0.19.1

常用的定位命令

1
2
3
4
5
6
# 查看命名空间kube-system详细的pod状态
kubectl get pod -n kube-system -o wide
# 查看pod的日志
kubectl describe pod <Pod名称> -n <命名空间>
# 查看pod的详细日志,可以查看到代码报错的堆栈
kubectl logs -f kubernetes-dashboard-658b66597c-jcw4s -n kubernetes-dashboard

Kubernetes常用命令

1
2
3
4
5
6
7
8
9
10
11
12
13
14
15
16
17
18
19
20
21
22
23
24
25
26
27
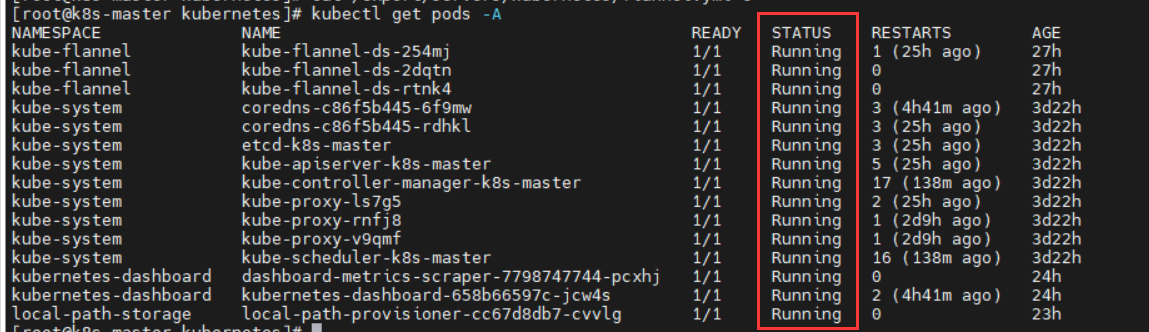
kubectl get all #查看所有启动的配置,包括容器,服务,监视等等等等 --all-namespaces 参数 可以看到所有命名空间的 -o wide 可以看到更多的信息,如容器启动在哪台机器上
kubectl get pods -o wide #查看pod
kubectl get pod name --output json #以JSON格式输出POD信息:
kubectl get pod name --output yaml #以yaml格式输出POD信息
kubectl get svc #查询所有实例的对外端口
kubectl describe pod xxx-mariadb-0 #查看pod的详情
kubectl get nodes #查看node节点
kubectl get rc,namespace #查看rc ,namespace
kubectl exec -ti xxx-jw64d sh #登陆到某个模块实例查日志或配置
kubectl cluster-info #查看集群状态
kubectl get deployments #查询Deployment当前状态
NAME DESIRED CURRENT UP-TO-DATE AVAILABLE AGE
nginx-deployment 3 3 3 3 2h
其中DESIRED为期望的Pod数量,CURRENT为当前的数量,UP-TO-DATE为已更新的数量,AVAILABLE为已运行的数量
kubectl get rs #Replica Set(RS)是k8s新一代的Pod controller
kubectl get cs #检查组件状态是否都正常 component status (CS)
kubectl get pods --show-labels
kubectl describe deployments
kubectl get pvc #获取 StatefulSet 的 PersistentVolumeClaims
kubectl exec nginx -- printenv | grep SERVICE #检查正在运行的 Nginx Pod 的环境变量
kubectl get services kube-dns --namespace=kube-system #检查 DNS 插件 Service
kubectl get pods -o yaml | grep -i podip
kubectl exec xxx-2xd57 date #对pod中的容器执行命令

kubectl delete pod name #删除某个POD
kubectl delete deployment kubernetes-dashboard --namespace=kubernetes-dashboard #删除
kubectl delete secrets xxx-secrets #或者在页面删除

附录

网络插件flannel的配置文件

/export/servers/kubernetes/flannel.yml

1
2
3
4
5
6
7
8
9
10
11
12
13
14
15
16
17
18
19
20
21
22
23
24
25
26
27
28
29
30
31
32
33
34
35
36
37
38
39
40
41
42
43
44
45
46
47
48
49
50
51
52
53
54
55
56
57
58
59
60
61
62
63
64
65
66
67
68
69
70
71
72
73
74
75
76
77
78
79
80
81
82
83
84
85
86
87
88
89
90
91
92
93
94
95
96
97
98
99
100
101
102
103
104
105
106
107
108
109
110
111
112
113
114
115
116
117
118
119
120
121
122
123
124
125
126
127
128
129
130
131
132
133
134
135
136
137
138
139
140
141
142
143
144
145
146
147
148
149
150
151
152
153
154
155
156
157
158
159
160
161
162
163
164
165
166
167
168
169
170
171
172
173
174
175
176
177
178
179
180
181
182
183
184
185
186
187
188
189
190
191
192
193
194
195
196
197
198
199
200
201
202
---
kind: Namespace
apiVersion: v1
metadata:
name: kube-flannel
labels:
pod-security.kubernetes.io/enforce: privileged
---
kind: ClusterRole
apiVersion: rbac.authorization.k8s.io/v1
metadata:
name: flannel
rules:
- apiGroups:
- ""
resources:
- pods
verbs:
- get
- apiGroups:
- ""
resources:
- nodes
verbs:
- list
- watch
- apiGroups:
- ""
resources:
- nodes/status
verbs:
- patch
---
kind: ClusterRoleBinding
apiVersion: rbac.authorization.k8s.io/v1
metadata:
name: flannel
roleRef:
apiGroup: rbac.authorization.k8s.io
kind: ClusterRole
name: flannel
subjects:
- kind: ServiceAccount
name: flannel
namespace: kube-flannel
---
apiVersion: v1
kind: ServiceAccount
metadata:
name: flannel
namespace: kube-flannel
---
kind: ConfigMap
apiVersion: v1
metadata:
name: kube-flannel-cfg
namespace: kube-flannel
labels:
tier: node
app: flannel
data:
cni-conf.json: |
{
"name": "cbr0",
"cniVersion": "0.3.1",
"plugins": [
{
"type": "flannel",
"delegate": {
"hairpinMode": true,
"isDefaultGateway": true
}
},
{
"type": "portmap",
"capabilities": {
"portMappings": true
}
}
]
}
net-conf.json: |
{
"Network": "10.244.0.0/16",
"Backend": {
"Type": "vxlan"
}
}
---
apiVersion: apps/v1
kind: DaemonSet
metadata:
name: kube-flannel-ds
namespace: kube-flannel
labels:
tier: node
app: flannel
spec:
selector:
matchLabels:
app: flannel
template:
metadata:
labels:
tier: node
app: flannel
spec:
affinity:
nodeAffinity:
requiredDuringSchedulingIgnoredDuringExecution:
nodeSelectorTerms:
- matchExpressions:
- key: kubernetes.io/os
operator: In
values:
- linux
hostNetwork: true
priorityClassName: system-node-critical
tolerations:
- operator: Exists
effect: NoSchedule
serviceAccountName: flannel
initContainers:
- name: install-cni-plugin
image: docker.io/rancher/mirrored-flannelcni-flannel-cni-plugin:v1.1.0
command:
- cp
args:
- -f
- /flannel
- /opt/cni/bin/flannel
volumeMounts:
- name: cni-plugin
mountPath: /opt/cni/bin
- name: install-cni
image: docker.io/rancher/mirrored-flannelcni-flannel:v0.19.1
command:
- cp
args:
- -f
- /etc/kube-flannel/cni-conf.json
- /etc/cni/net.d/10-flannel.conflist
volumeMounts:
- name: cni
mountPath: /etc/cni/net.d
- name: flannel-cfg
mountPath: /etc/kube-flannel/
containers:
- name: kube-flannel
image: docker.io/rancher/mirrored-flannelcni-flannel:v0.19.1
command:
- /opt/bin/flanneld
args:
- --ip-masq
- --kube-subnet-mgr
resources:
requests:
cpu: "100m"
memory: "50Mi"
limits:
cpu: "100m"
memory: "50Mi"
securityContext:
privileged: false
capabilities:
add: ["NET_ADMIN", "NET_RAW"]
env:
- name: POD_NAME
valueFrom:
fieldRef:
fieldPath: metadata.name
- name: POD_NAMESPACE
valueFrom:
fieldRef:
fieldPath: metadata.namespace
- name: EVENT_QUEUE_DEPTH
value: "5000"
volumeMounts:
- name: run
mountPath: /run/flannel
- name: flannel-cfg
mountPath: /etc/kube-flannel/
- name: xtables-lock
mountPath: /run/xtables.lock
volumes:
- name: run
hostPath:
path: /run/flannel
- name: cni-plugin
hostPath:
path: /opt/cni/bin
- name: cni
hostPath:
path: /etc/cni/net.d
- name: flannel-cfg
configMap:
name: kube-flannel-cfg
- name: xtables-lock
hostPath:
path: /run/xtables.lock
type: FileOrCreate

参考文章

IoT运维 - 如何部署一套高可用K8S集群
手把手教你一套完善且高效的k8s离线部署方案
Flannel-io Github repo
快速部署高可用k8s集群的工具kubeasz

声明:本站所有文章均为原创或翻译,遵循署名 - 非商业性使用 - 禁止演绎 4.0 国际许可协议,如需转载请确保您对该协议有足够了解,并附上作者名 (Tsukasa) 及原文地址